Considering the installation of a PVC curtain kit from PVC Strip? Our guide provides comprehensive details for installing our highly versatile hook-type curtain kits. Ideal for a wide range of settings, including industrial areas and commercial entryways, these kits are engineered for simplicity in setup and are an excellent choice for enhancing insulation, regulating temperatures, or controlling contaminants. Follow our step-by-step instructions to set up your PVC curtains quickly and efficiently.
Understanding Your Kit
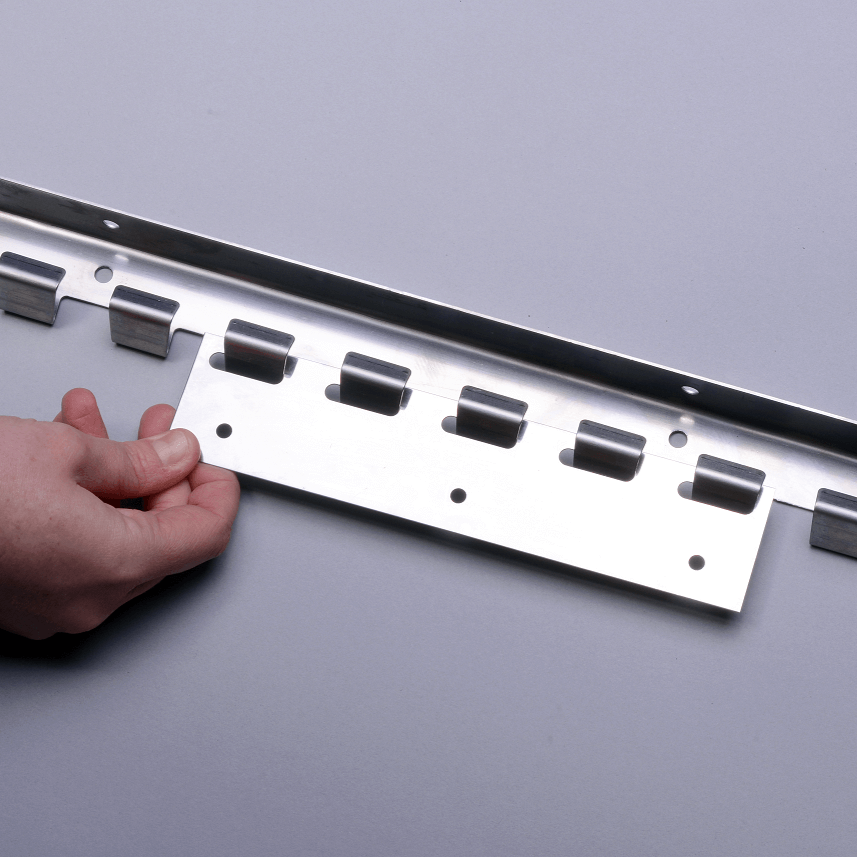
Each PVC strip curtain kit is packed with everything required for an easy installation. Depending on your space’s needs, the rails can be mounted using two methods: face fit and soffit fit. Additionally, our PVC strips are crafted for flexibility and strength, ready to withstand the rigours of any setting.
Step 1: Preparing the Suspension Rail
Our suspension rails are designed for versatility, allowing installation either on your opening’s face or on the soffit (the underside of a beam, door jamb, or ceiling).
- Face Fit Applications: for installations directly on the opening’s face, ensure the rail’s hook-facing side is outward. This straightforward method facilitates easy access to the hooks for strip hanging.
- Soffit Fit Applications: for undermount installations, utilise the rail’s hook-less side. This method is perfect for achieving a seamless aesthetic.
For larger openings, rails may be provided in segments. Simply align these segments end-to-end to cover the opening fully.
Step 2: Attaching the PVC Strips
With the rail secured, proceed to attach the PVC strips. For an effective seal, hang these in two layers, front and back.
- Start with the back layer, attaching strips to the rail with suitable spacing for the intended overlap. For example, use three open fingers between each 200mm wide strip for a standard overlap.
- Continue with the front layer, positioning strips to cover the gaps in the back layer, improving the barrier’s density.
Note the curvature of the strips, adjusting so the convex side faces out in the back layer and the concave side out in the front, to optimise the curtains’ effectiveness. See the diagram below.

Step 3: Adjusting the Length
Our kits come slightly oversized to accommodate on-site adjustments and the natural dimensional changes of PVC.
- Let the strips settle for at least 12 hours after installation, 24 hours for optimal results, to eliminate any packaging-induced distortions.
- Trim the strip ends to your desired length, maintaining a small gap from the floor to prevent tripping hazards and ensure smooth traffic. A sharp utility knife is recommended for a clean cut.
Fitting Guide Based on Strip Width and Overlap
The number of open fingers between strips varies with their width and your desired overlap:
| Width | Overlap | Open Fingers |
| 200mm | 40% (Medium) | 3 |
| 200mm | 80% (Full) | 1 |
| 300mm | 28% (Minimum) | 5 |
| 300mm | 55% (Medium) | 3 |
| 300mm | 85% (Full) | 1 |
| 400mm | 35% (Minimum) | 7 |
| 400mm | 55% (Medium LW) | 5 |
| 400mm | 75% (Medium HW) | 3 |
| 400mm | 95% (Full) | 1 |
For a more detailed guide, click here.
By adhering to these guidelines, installing your PVC Strip hook-type curtain kit is straightforward, resulting in an efficient barrier for your area. For additional support, contact us at 01925 638753 or via email at sales@pvc-strip.co.uk.